This course introduces the origins and historical development of photography. Emphasis is placed on the study of composition and history of photography as an art form. Upon completion, students should be able to recognize and produce, using color transparencies, properly exposed, well-composed photographs. Students are also permitted and encouraged to utilize color negative, chromogenic film and digital capture. This course has been approved to satisfy the Comprehensive Articulation Agreement for transferability as a premajor and/or elective course requirement.
I only include assignments here. You will first see the directions for the assignment, and then my completed assignment.
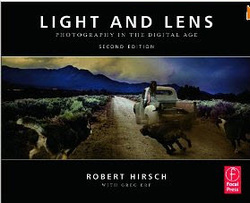
The textbook we use in this class is called Light and Lens: Photography in the Digital Age, Second Edition by Robert Hirsch,
2012, Focal Press, ISBN-13: 978-0-240-81827-6
I rented the Kindle version and it was done well (and it was cheaper!)
There is a checkmark next to assignments that I have already completed.
WEEK 1
SCAVENGER HUNT INTRODUCTION
This assignment will aid in an exploration of photography as an art form. The goal is for each student to investigate a variety of photographs and become acquainted with the history and evolution of the medium.
This assignment will aid in an exploration of photography as an art form. The goal is for each student to investigate a variety of photographs and become acquainted with the history and evolution of the medium.

PART ONE OF THE ASSIGNMENT: Choose two photographs you enjoyed - any two, from any section of the assignment. Answer the following questions in relation to the photos. Be specific and thorough. What images did you choose? (Post the photos, artist an date produced.) What parts of the images did you find effective? Why? What was the subject matter of each of the two photos? What message or story do you think the photographer attempting to communicate? Why?
Completed Assignment 10/23/2013

PART THREE OF ASSIGNMENT: Take some time to discover the portfolio pages within each site. CLARE CARTER, LISA ELMALEH, DAVID FAVROD, MICHAEL HANSON, SAM KAPLAN, LISA LINDVAY, VIK MUNIZ, KATIE ORLINSKY, MARTIN PARR, JULIAN RÖDER, , BRYAN SCHUTMAAT, EVA STENRAM
Next, complete the following. 1. Choose three websites you enjoyed most. 2. Choose one work from each of your chosen websites. Answer the following questions for each image you choose. Be specific and thorough. ✦ Note the name of the piece, artist name and date. ✦ What do you see? Be specific, and consider why those areas caught your attention. ✦ What do you think is the subject of the photograph? Why do you think so? ✦ What was the photographer attempting to communicate? Why do you think so? |
Completed Assignment 10/23/2013
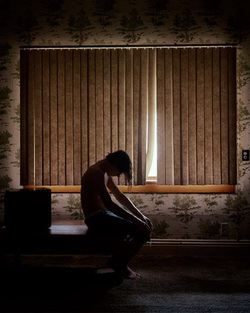
Lisa Lindvay, no date
I see a dark room with a young boy sitting hunched over with his hands on his knees. His head is lowered. A window takes up most of the shot. The blinds are closed except for one strip of blind that is moved to the side letting in a bit of sunlight. The sunlight catches my attention because it is the only bright spot in the photograph. The boy catches my attention because he is so much in the dark that he stands out against the white of the sun filtering into the room. I think the subject is the boy and the photographer is trying to communicate a feeling of sadness and hopelessness amidst life (sun) going on outside. The outside is bright and alive, while the inside is dark and sad. |
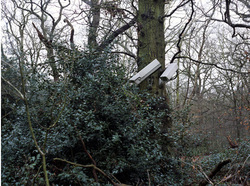
Landscape with Cameras by Eva Stenram
2005 The photo shows a wooded area with security cameras attached to the tree. The cameras caught my attention because the light color stood out from the greens and browns of the woods and because the objects just seemed so out of place. Obviously, the cameras are the subject of the work. I felt that the photographer was making a statement about the natural world being invaded by the modern world and the intrusiveness of humans into the natural world. It was interesting to read what the photographer did intend to say, which was that the gaze of the cameras is similar to the gaze of birds. |
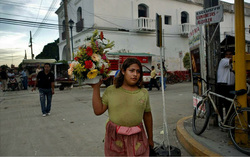
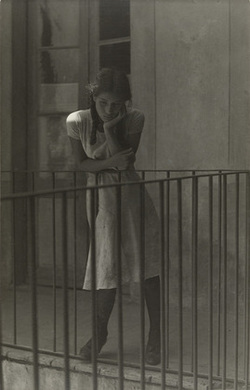
The Third Gender, Katie Orlinksy, no date
I see a young person carrying colorful flowers through a street. There is a white building in the background, a bike on the right, and a patch of blue/white sky in the right upper corner. From the title of the piece, I am guessing that what at first appears to be a young girl is actually a young man dressed like a girl. His clothes are bright and flowery yet very soiled. The street is littered with trash and the buildings look run down. In stark contrast are the flowers that the boy holds aloft - reds, yellows, whites in a fresh clean white container - the flowers look fresh and alive while everything else in the photo is dirty. The subject is the boy with the flowers. No one is really paying any attention to the boy dressed as a girl. I get the feeling they would be more interested in the pretty flowers than the boy. I think the photographer is communicating the ambiguity of gender and how this third gender has become a normality in many parts of society. |
WEEK 2 VISUAL DESIGN - Completed assignment 11/01/13
I found a subject for high contrast in my bathroom. I was so excited by the scene that I forgot to set it to monochrome. 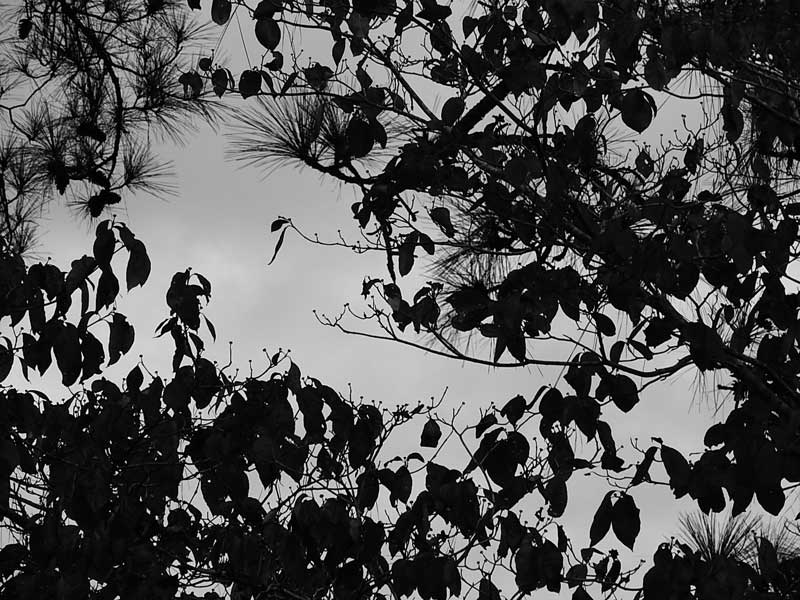
|

I used this photo of a black pencil among light pencils. The black pencil (point) is the focal point based on the contrast of color. 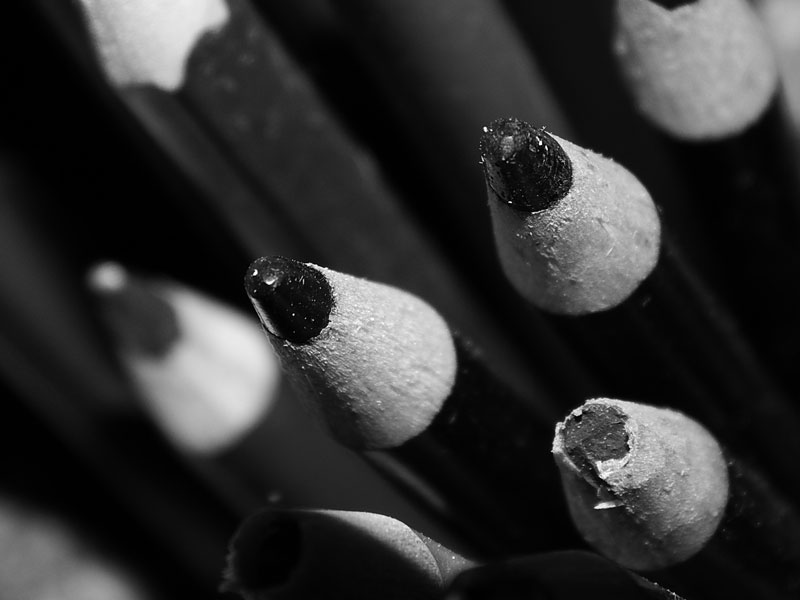
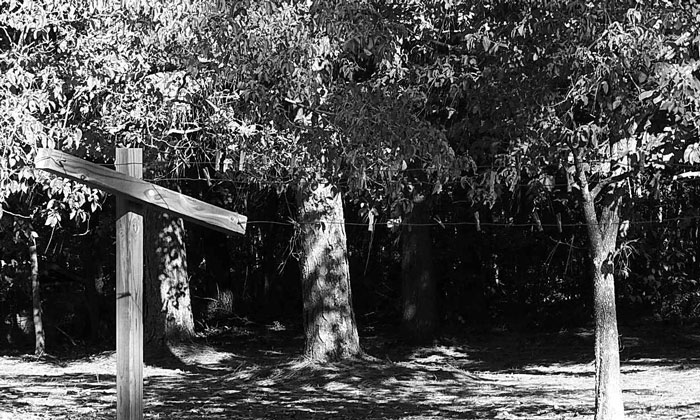
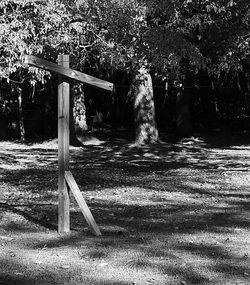
I also photographed my clothes line because I liked the way the post on the left was leaning, almost resembling a crucifix. The actual lines of the clothesline lead the viewer from the post (point) to the right side of the photo. This would have worked better if you could see the lines of the clothesline better.
|
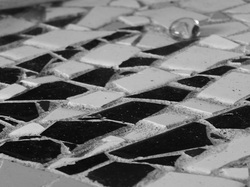
For point, I chose a marble on my mosaic backgammon table. The point is the marble; this is where the viewers eye would travel first. For line, I also used the backgammon table. The lines lead from left to right, from lower to upper, beginning with the point (the marble). 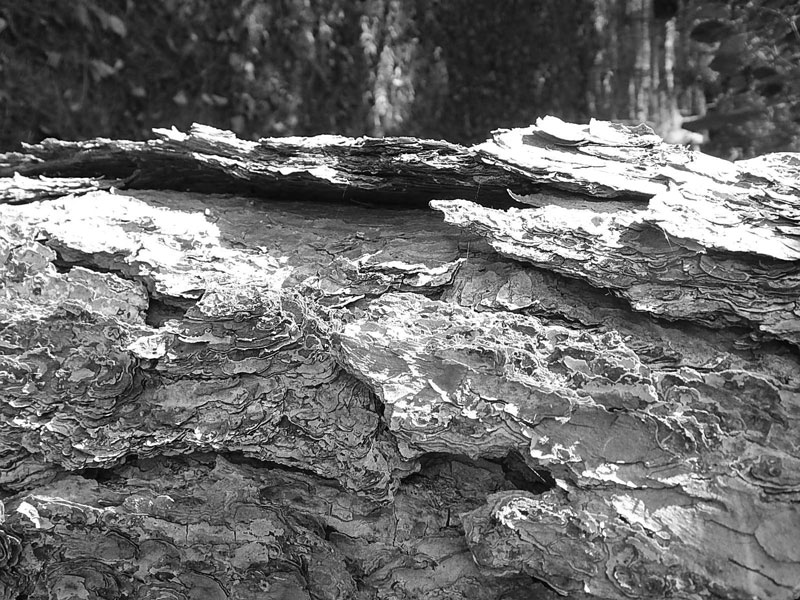
I also photographed the bark on one of my pine trees. I love getting in close to a subject this way. How often do we really look at the bark on a tree? With the play of light and shadow on the bark, it creates such depth to the bark. I really like this photograph.
|
I am still learning the digital camera, so I mostly used automatic settings for all of the photos. For some I chose to use macro so I could get in closer to the subject. With the exception of the pencils and the barrette, I did not use flash.
I had a difficult time with the two-dimensional assignment, largely because I am still figuring out to use the digital camera (I have always used a SLR). I finally settled on taking a photograph of a sign in my yard. I got very close to the sign so I could see the texture of the sign but the letters blended in with the texture without being recognizable. I am not sure if I did this one correctly. I took one shot and then turned the macro on and took another. I am not sure why the macro came out with different lighting. I used daylight with no flash.
I found high contrast the easiest to illustrate because that is a pretty easy concept to grasp - dark/light, muted color/vibrant color, harsh/soft, etc. The most difficult for me is positive/negative space using a two dimensional subject. This is what I did, but I have no clue if I did it right.
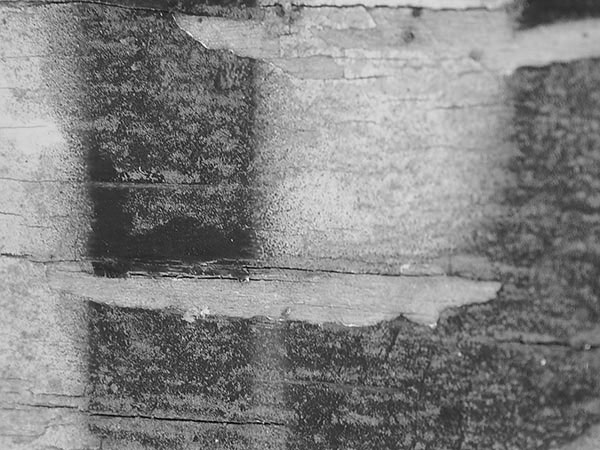
For texture, I photographed an old tree stump in my yard. I really liked the way the lines swirled around. I am still trying to decide how best to lead the viewer through the photo. I see the knot as the point and then the lines lead the viewer around the photo and back to the point. I love the rough feel of the photo. I ended up cropping the photo to remove my shadow, something I didn't notice when taking the photo. 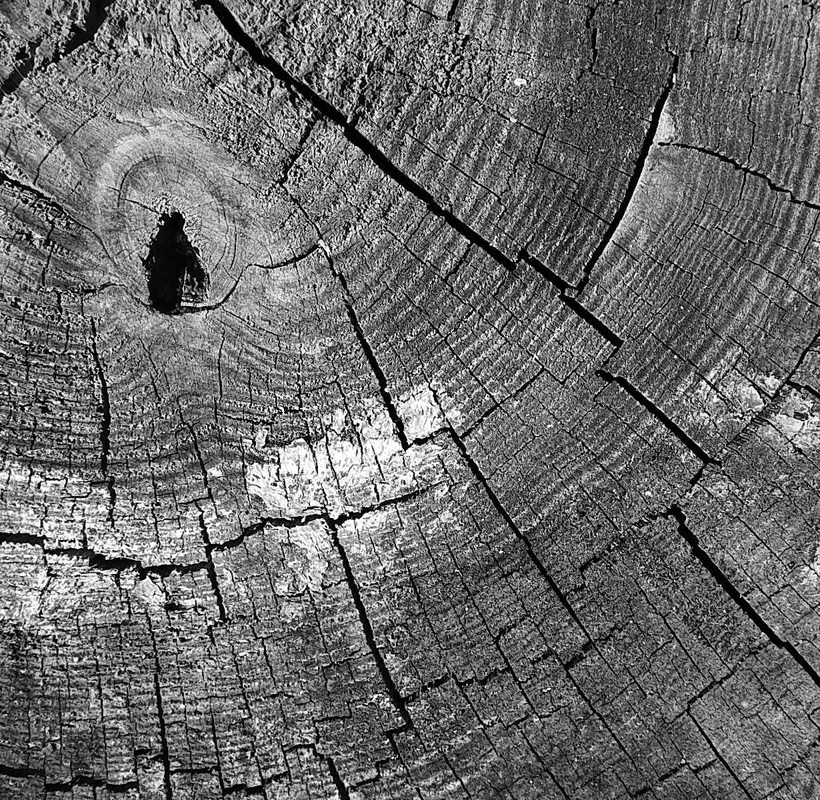
|
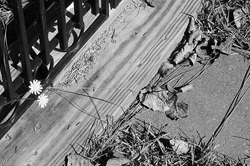
Another photo I chose but am not sure about is the flower next to the gate. The flower stands out by its difference and draws the eye across the photo via the lines of the gate.
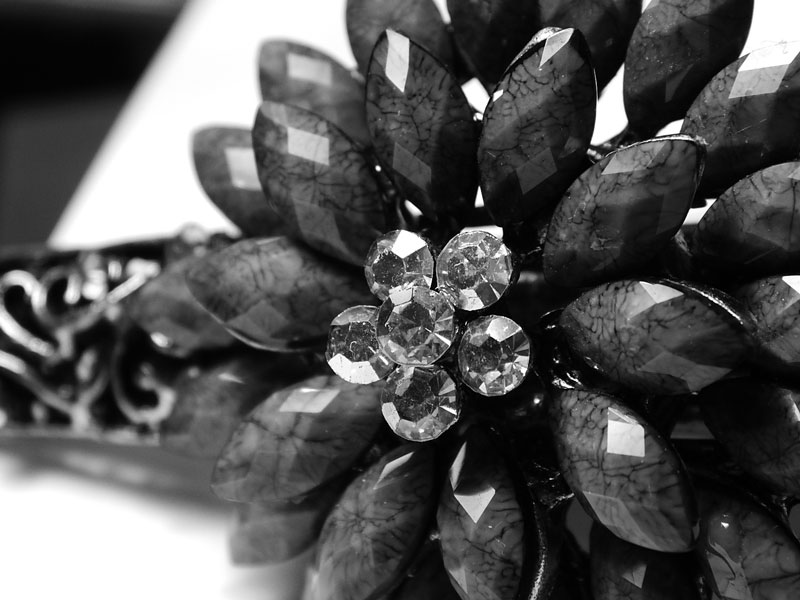
I chose a hair barrette for the three-dimensional subject assignment. I used macro to get up close to the subject. I took several shots from different angles.
|
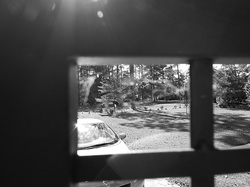
For the figure ground assignment I chose the screen that separates my carport from the driveway. I framed the photo so that the screen framed the shot. 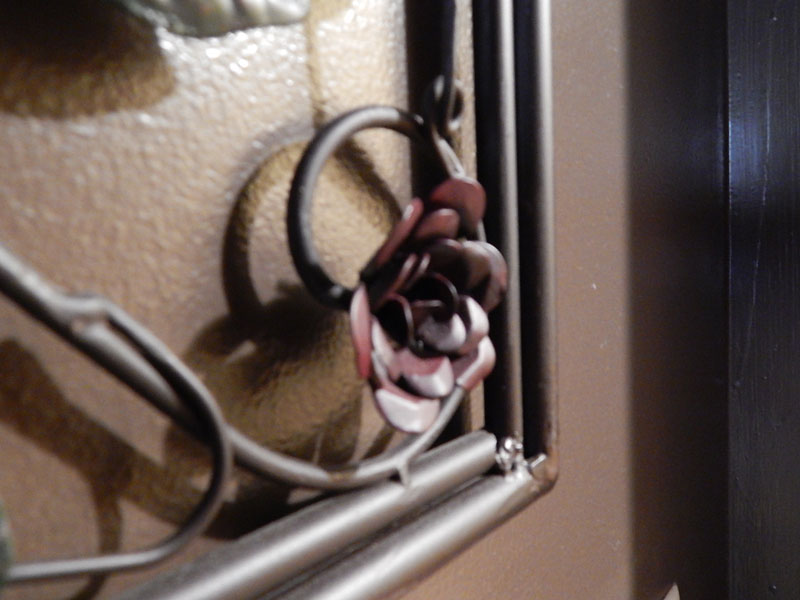
I had a hard time with the low contrast assignment. I take low contrast to mean values of one color; in other words colors that are similar - like all blues or all browns. I took a few shots of a wall hanging that is all dark tones of brown and red. I am not sure if it is an appropriate example of low contrast or not.
|
WEEK THREE Visualization & Color, Vantage Point, Photo Surface
ASSIGNMENT PART ONE: You will choose one word from the following list, and illustrate its meaning as you see fit. You must submit no less than three altered pieces at the conclusion of this assignment. You may tell a story with a few images, or illustrate different thoughts based on the original concept. The choice is yours. Choose one of the following words to illustrate. Remember, you may use only one of the following words as your primary concept. The interpretation and illustration of its meaning is entirely up to you. ✦ innocence ✦ truth✦ conflict ✦ desireCarefully edit your photos and decide upon the manipulation technique(s) to suit the concept. There are numerous ways to alter the surface of any image. Don’t worry at all if you do not feel comfortable drawing or painting. Such skills are not necessary here. Just be creative, and have fun! Here are a few techniques:
✦ hand coloring with transparent paints ✦ scratching or sanding the surface of negatives and or prints
✦ layering or permeating the image with wax ✦ ripping imagery
✦ peeling images ✦ burning sections or edges of negatives and/or prints
✦ sketching on the image ✦ enhancing an image with drawing tools (charcoal, paints, etc.)
✦ blocking areas out ✦ toning with photo toners, or other liquids, such as tea and coffee
|
Here are some of the questions to answer...
✦ What camera settings did you choose? Why? ✦ How did you compose the images? Why? ✦ What word did you choose to illustrate? Why? ✦ What did you do to alter the images? Why? ✦ Which techniques did you find most successful? Why? ✦ Which techniques did you find least successful? Why? |

|
ASSIGNMENT PART TWO
✦ Choose only one subject. It must be something inanimate you find visually interesting. It might be a room in your home, a street in your town, or an abandoned building. Use your imagination.
✦ Use only one focal length throughout the assignment. Do not zoom in and out with your lens.
✦ Do not crop any image within Photoshop or any other imaging software. All framing should be done during image capture.
✦ Examine and photograph your subject carefully with the idea of revealing as many of its qualities as possible. Photograph the scene from every possible angle (eye level, ground level, overhead, etc.).
OPTIONS
✦ Move around the subject, get in closer to fill the frame. Step back to include the background.
✦ Look for interesting color combinations, textures, and patterns.
✦ Don't be afraid to get dirty. How would your subject appear to a child, an ant or someone on a roof or cliff top?
✦ Capture images at varying times of day with different lighting conditions. Photograph your subject in the morning, midday, and evening lighting conditions. Watch the change in colors, and overall contrast. Watch how an evening side light has different effects from a midday overhead light.
✦ If possible, photograph in different weather conditions. What are the effects of bright sun, fog, rain, etc. Each will be different, and imbue the imagery with a different mood.
✦ With a few frames, try to make your subject difficult to recognize solely through framing. Experiment in every way possible to interpret your subject fully.
|
|
Here are some questions to answer...
✦ What subject did you choose? Why? ✦ How did you compose the photos? Why? ✦ What camera settings did you use? Why? ✦ What settings did you let the camera set automatically? Why? ✦ Which vantage points were most successful? Why? |
WEEK FOUR Image Capture & Pinhole Photography
PINHOLE PHOTOGRAPHY INTRODUCTION
The objective of this assignment is to discover how simple a camera can be. You will also find precisely how aperture and exposure time work together to create photographic images. Pinhole photography has been around, in one form or another, for a long time. The camera lucida and obscura were used by artists to learn perspective and draw or paint realistic scenes. Eventually, a similar design was combined with light sensitive materials to create photographs. Pinhole photography can be extremely inexpensive. No fancy equipment is needed at all. Granted, there are some very fancy models on the market. But all you really need is a little time, patience and a quick trip to the local hardware store.
The objective of this assignment is to discover how simple a camera can be. You will also find precisely how aperture and exposure time work together to create photographic images. Pinhole photography has been around, in one form or another, for a long time. The camera lucida and obscura were used by artists to learn perspective and draw or paint realistic scenes. Eventually, a similar design was combined with light sensitive materials to create photographs. Pinhole photography can be extremely inexpensive. No fancy equipment is needed at all. Granted, there are some very fancy models on the market. But all you really need is a little time, patience and a quick trip to the local hardware store.
ASSIGNMENT
This assignment is often a source of difficulty and frustration. Review the videos, documents and additional links provided regarding pinhole photography. Proceed carefully. Use your time wisely and do not procrastinate. Begin asking questions early and often.
STEP ONE
First, choose one of the following options.
✦ Build a pinhole camera designed to expose 35mm film. There are many designs available to you, in the videos, documents and links provided. For example, the matchbox pinhole design has proven very successful.
✦ You may purchase a pinhole camera. If you choose this option, be sure you allow enough time for shipping. This may seem the simplest choice. However, there are many models to choose from, and each has its own logistical issues to work through. If you are unsure where to find a pinhole camera, Freestyle Photo is a highly reliable vendor, and has some very inexpensive options. This company is included in the resource list located in your course booklet, and the resources section of the course site. Note: Only use pinhole camera models that accept film. Do not use pinhole modes on digital cameras, or pinhole lens caps designed for digital cameras. These do not provide the same effects, or opportunity to learn.
STEP TWO
If you built your camera...Expose no less than 2 rolls of film. You may use color negative, transparency or chromogenic black and white film. It is your choice. Keep in mind, film with lower ISO/ASA ratings will require longer exposure times.
If you purchased your camera...Expose no less than 4 rolls of film. You may use color negative, transparency or chromogenic black and white film.
It is your choice. Keep in mind, film with lower ISO/ASA ratings will require longer exposure times.
Regardless of camera choice...Submit an image of the pinhole camera you chose to use. Simply snap a shot with your cell phone or other camera. Then label the file, and submit the photo with your other assignment components. Be sure to keep an exposure record for each frame. You will not have a choice of apertures, but your shutter speed, or exposure time, will vary. Exposing film in pinhole photography can be a bit tricky. The more notes you keep, the better.
Note: If you are not confident about exposure times, I recommend exposing one roll and processing it. Once you view the results, you can alter your technique as needed for your next roll.
STEP THREE
Take the exposed film to a lab for processing. You may have prints made for your own use. Please be sure to scan your film, or direct the lab technicians to burn your files to a disc. Then, compile all images into contact sheets, and submit without editing. Note: Unless you visit a professional lab, the technicians will probably not know what pinhole photography is. Explain what you want, and what you need.
|
Here are some questions to answer...
✦ What camera design did you choose? Why? ✦ What subjects did you choose? Why? ✦ What exposure times did you use? Why? ✦ What vantage points did you use? Why? |
|
WEEK FIVE Exposure & Thinking About Imagery, Still Life Photography
STILL LIFE INTRODUCTION
The term “still life” refers to a specific genre in the arts. It is defined as a depiction of an arrangement of objects. Still life photography requires you to construct, rather than discover the scene. It requires patience and careful attention to detail. It also allows the artist complete control over composition and lighting. This assignment is also an opportunity to practice creatively controlling the depth of field in your photos.
The term “still life” refers to a specific genre in the arts. It is defined as a depiction of an arrangement of objects. Still life photography requires you to construct, rather than discover the scene. It requires patience and careful attention to detail. It also allows the artist complete control over composition and lighting. This assignment is also an opportunity to practice creatively controlling the depth of field in your photos.
ASSIGNMENT PART ONE
In this part of the assignment, you’ll photograph a simple material and explore it’s creative potential.
REQUIREMENTS:
✦ Choose one large sheet of colored paper.
✦ Use no other objects/subjects within the photos.
✦ Add no additional variables. Alter only the paper, and the light illuminating the paper.
✦ Capture at least 20 different images, using only this one sheet of colored paper.
OPTIONS:
✦ Manipulate the paper in any way you like.
✦ Curl, roll, and bend the paper in any way.
✦ Move the lights, carefully monitor the highlight and shadow areas.
✦ Capture and analyze the differences created by altering the paper and lights.
Note: If possible, use a sheet measuring up to 30 x 40 inches. A large piece of paper will allow you to create more varying
compositions, and focus more easily.
ASSIGNMENT PART TWO
IMAGERY REQUIREMENTS
First and foremost, only photograph objects you have arranged and lit yourself. Be patient, take your time, and monitor the foreground and background in each photo. Watch how the highlights and shadows change in subtle ways when you move the lights, or use reflectors. Every image should reflect your efforts to compose a strong composition. Be sure to explain your choices in your written document. The first three requirements, framing, background & lighting, and vantage point, apply to all photographs taken while working on this assignment. Every image should demonstrate the effort needed to compose a strong composition. Create at least 20 completely different images in this section of the assignment.
FRAMING
In each shot, confine your composition to a space not exceeding 12 inches x 12 inches. You may set the lighting equipment outside this space. If your camera is unable to focus on the confined space, your lens may not be capable of such a minimum focusing distance. In this case, you may expand the prescribed space until you are able to focus properly.
BACKGROUND & LIGHTING
Consider your backgrounds as carefully as your subjects. Does the background help concentrate attention on your primary subject? Do the lines and colors help to balance the composition? Or is your background distracting? Describe and justify your choices in the written portion of the assignment. Beautiful backgrounds may be made from simple materials including fabric and paper. Do not use only one material throughout the project. You must alter backgrounds at least twice in your assignment. Use both light, and dark backgrounds. Arrange your lighting carefully. Describe and justify your choices in the written portion of the assignment. Find some desk lamps to use, and/or arrange your scene in relation to an open window to control the lighting direction. Use at least two completely different lighting setups. Consider front lighting, side lighting, and even lighting your scene predominately from behind.
VANTAGE POINT
Vary your vantage point while working. Cover the angles. Take a few shots holding the camera even with the subject. Snap a few overhead shots, looking straight down at the subjects. Even the most mundane objects can become interesting with a different vantage point.
CAUSTICS
A caustic is a bright shape created by the focusing of light through an imperfect lens or other curved transparent object. For example, the pattern of light on a countertop made by light passing through a wine glass is a caustic. At least one of your photos should include a caustic. It is also possible to create caustics from curved mirrored surfaces. Hint: Try dramatic side lighting to create caustics with glass objects.
ASSIGNMENT PART THREE
In this part of the assignment, you’ll create photographs transforming the appearance of mundane objects. Refer to the Solar System Cha!enge included in the module. In the series, Simon Wright used a variety of easily found items to mimic the appearance of the planets in our solar system.
Choose one of the following options:
✦ Mimic the appearance of microorganisms (bacteria, viruses, etc.), using only easily found items. For example, you might use twisted strips of paper to mimic the shape of some viruses. Or, you might use dried beans to represent some varieties of bacteria.
✦ Mimic the appearance of celestial bodies (stars, planets, nebulas, etc.), using only easily found items.
Create at least 20 original photographs, transforming mundane objects into something completely different. Experiment with light, color, and vantage points.
|
Here are some of the questions to answer...
✦ What subjects did you choose? Why? ✦ What camera settings did you choose? Why? ✦ How did you compose the images? Why? ✦ Did you have any problems creating your photos? Were you able to resolve these problems? ✦ Which backgrounds and lighting conditions were most effective? Why |
WEEK SIX Seeing Light & Landscape/Architecture Photography
ARCHITECTURE AND INTERIORS INTRODUCTION
Good photography often shows us the familiar in an unfamiliar way. In this assignment, you will photograph the spaces people live and work in and fit them into a frame. Man-made structures are more geometric than natural scenes, so consider the following while you work:
✦ The geometric shapes you see in your chosen subjects.
✦ Repeating elements and size relationships as they change under perspective.
✦ Lines and vanishing points.
✦ The textures and weathering of man-made structures.
One way to surprise people with architecture and interior photography is by using clever composition to highlight these geometric aspects of structures that are usually overlooked. The requirements this week will allow you to play with geometry, and also to think about the practical concerns of people who need to represent an interior space in a photograph.
PART ONE ASSIGNMENT
Expose no less than 36 frames in the course of this assignment. Each photograph you create, edit and submit should meet
one or more of the following requirements.
VERTICAL VANISHING POINTS
Your vantage point and camera positions will affect the appearance of vertical lines in photos. If you hold the camera level,
with the lens parallel to any vertical lines (trees, buildings, etc.), those lines will appear parallel in the shot. If you hold the
camera at an angle, perhaps looking upwards to capture the top of a tall building, those lines will appear to converge in
photos.
✦ In at least one of your photos, vertical lines must visibly converge to a vanishing point either within, or nearly
within your frame.
✦ In at least one of your photos, vertical lines must appear parallel in your photograph.
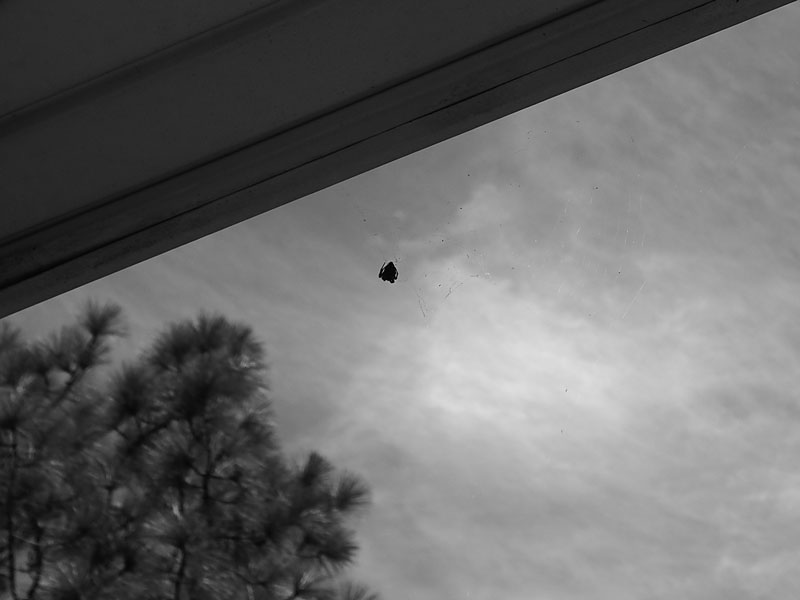
FRAME YOUR SHOT
At least one of your photos should be shot through a door, window, archway, or other physical man-made frame. The frame
should be visible in the photograph, but is not necessarily the subject. The frame may be any shape.
MAN MEETS NATURE
Take at least one photograph where the subject is neither a man-made construction, nor anything natural, but rather the
interface between two such things. For example, where the side of a building meets the ground, or a tree growing through a
fence. Be creative!
Expose no less than 36 frames in the course of this assignment. Each photograph you create, edit and submit should meet
one or more of the following requirements.
VERTICAL VANISHING POINTS
Your vantage point and camera positions will affect the appearance of vertical lines in photos. If you hold the camera level,
with the lens parallel to any vertical lines (trees, buildings, etc.), those lines will appear parallel in the shot. If you hold the
camera at an angle, perhaps looking upwards to capture the top of a tall building, those lines will appear to converge in
photos.
✦ In at least one of your photos, vertical lines must visibly converge to a vanishing point either within, or nearly
within your frame.
✦ In at least one of your photos, vertical lines must appear parallel in your photograph.
FRAME YOUR SHOT
At least one of your photos should be shot through a door, window, archway, or other physical man-made frame. The frame
should be visible in the photograph, but is not necessarily the subject. The frame may be any shape.
MAN MEETS NATURE
Take at least one photograph where the subject is neither a man-made construction, nor anything natural, but rather the
interface between two such things. For example, where the side of a building meets the ground, or a tree growing through a
fence. Be creative!
|
Here are some of the questions to answer...
✦ What camera settings did you choose? Why? ✦ How did you compose the images? Why? ✦ What image did you have the most difficulty creating? Why? ✦ What image did you enjoy creating most? Why? ✦ What would you do to improve your work? |
PART TWO: LANDSCAPE INTRODUCTION
This assignment will focus on landscape photography, both natural and urban. Remember the material from module 3, regarding design and composition. Remember the lessons from module 5, regarding perspective. These lessons will serve you well here. This is an opportunity to build on those skills, and apply the knowledge While exploring a specific concept. The difference between mundane, and great landscapes is often composition. Pay attention to lines, framing, suggestive forms, diagonals, s-curves, balance, rhythm and texture. Also pay close attention to the lighting conditions. Look for light that will support your work. Light color, direction, time of day, cloud cover - any of these may provide a particular mood, or other effect to make your images more striking.
This assignment will focus on landscape photography, both natural and urban. Remember the material from module 3, regarding design and composition. Remember the lessons from module 5, regarding perspective. These lessons will serve you well here. This is an opportunity to build on those skills, and apply the knowledge While exploring a specific concept. The difference between mundane, and great landscapes is often composition. Pay attention to lines, framing, suggestive forms, diagonals, s-curves, balance, rhythm and texture. Also pay close attention to the lighting conditions. Look for light that will support your work. Light color, direction, time of day, cloud cover - any of these may provide a particular mood, or other effect to make your images more striking.
ASSIGNMENT
Expose no less than 36 frames in the course of this assignment. Each photograph you create, edit and submit should meet one or more of the following requirements.
USE AN S-CURVE
S-Curves can be used in photographs for a variety of purposes. They can lead the viewer's eye to the subject, convey a sense of depth (ex: a road winding into the distance), or they can be flat compositional elements that create a balanced scene. At least one of your photos this week should use an S-Curve for one of these purposes. Describe in the comments what purpose the S-curve serves in the composition. Note that the S-curve we refer to here is not the same thing as an S-curve you might use in a curves layer in Photoshop to enhance contrast.
TEXTURE
Capture at least one successful image in which the main, or even sole compositional element is a natural texture. Do not isolate a small area of texture. Instead, choose a scene filled with texture - such as a jumble of branches and leaves. Interesting natural textures can also include grass, rock, sand, and clouds. You'll find that textures under grazing light appear richer, which leads us to the next requirement...
THE GOLDEN HOUR
The golden hour is the hour after dawn or the hour before sunset when the light is a rich golden color. The light strikes the earth at a grazing angle, emphasizing details and warming the scene. At least one of your photographs this week must be of a landscape taken during the golden hour. Dawn is definitely preferable, as the air is much clearer, but if your sleep schedule makes dawn either too late or too early, sunset is certainly acceptable.
|
Here are some of the questions to answer...
✦ What camera settings did you choose? Why? ✦ How did you compose the images? Why? ✦ What image did you have the most difficulty creating? Why? ✦ What image did you enjoy creating most? Why? ✦ What would you do to improve your work? |
WEEK SEVEN Social Identity & Portraiture
PORTRAITURE INTRODUCTION
The purpose of this assignment is to consider conventions of portraiture such as pose, expression and gaze and setting. Artists have always been interested in capturing likenesses of themselves and other people. Successful, complex portraits reveal not only what the sitter looks like, but also aspects of his or her character, and even something about the attitudes of the artist. Looking at a portrait, we may ask ourselves what the artist has chosen to show (of him- or herself and of the
sitter), and how those characteristics are indicated (through gestures and expressions, or perhaps through the choice of materials or artistic style).
POINTS TO CONSIDER REGARDING PORTRAITURE IN GENERAL
✦ Why do people sit for portraits? Have you ever posed for a portrait?
✦ Did you do anything to prepare for the photograph - use a particular pose, facial expression, or outfit? Why?
✦ Where you happy with your portrait?
POINTS TO CONSIDER REGARDING IMAGERY FROM RESOURCE MATERIALS
✦ What details do you notice about the body language and facial expressions of the people pictured?
✦ What stories do the portraits seem to tell? Why?
✦ How was the image composed? What effect did the design have on the final impact?You will need to create at least 60 images total this week.
PART ONE ASSIGNMENT
People can be fascinating subjects. Take all the skills you've learned during the course and create meaningful portraits. Think about lighting, backgrounds, depth of field, composition, and color. It is easy to become engrossed in your subjects and ignore other parts of the scene, including backgrounds. Work to avoid this.
Complete each of the following:
1. Create at least 20 portraits in which the subjects are aware of the camera.
2. Create at least 20 portraits in which the subjects are entirely unaware of the camera. For example, a photo showing a face averted does not qualify as an unposed image. Although you may photograph strangers, this is not necessary. Simply catch your subjects off-guard.
If you find yourself without anyone willing to model for you this week, you can take a self-portraits, which is an interesting type of photograph, and adds a degree of difficulty.
PART TWO ASSIGNMENT
In this section of the assignment, you’ll create a visual answer to the following question: WHO ARE YOU?
1. Create at least 20 photos to complete this section of this assignment. Create plenty of images, so you have choices for your final piece. Dedicate your energy to composing your images. Then, incorporate text with your original color and/or black and white imagery. Save the files and compile all exposures into contact sheets.
You may use any number of techniques including:
✦ black and white photography
✦ color photography
✦ digital photography
✦ collage/montage
✦ retouching and text tools within Photoshop
2. Edit your work. Choose a few images that you find particularly expressive and will help to form your answer to the question, Who are you?.
3. Create a final piece incorporating the image and text to compose your response. You must incorporate both the image and text together in a creative or surprising way. You may piece the components together by hand, scanning the final result.
Note: Do not treat this as a scrapbook entry. Be mindful of your basic concept. The choices you make must support that concept. Avoid using extraneous special effects for a flashy, gimmicky finish. Avoid excess decoration. Very often, less really is more. Otherwise, anything goes.
|
In the written portion of the assignment, briefly discuss the following points:
✦ Define the word identity. What are the different factors that contribute to someone’s identity? ✦ Discuss how the way someone looks: their clothing, facial expression and body language, for example, may or may not reflect their identity. ✦ Develop a definition of the word portrait. Propose a few reasons why people sit for portraits. ✦ How might someone’s body language suggest that he or she is posing or aware of the camera? ✦ Reflect on photographs taken when the subject of the image was unaware of the camera. How might these photographs differ from ones for which the subjects were consciously posing? ✦ How does the behavior of the photographer change when he or she is taking a clandestine photograph? ✦ How does the relationship between the photographer and subject change? |
|
Here are some of the questions to answer:
✦ What subjects did you choose? Why? ✦ What camera settings did you use? Why? ✦ How did you compose the photos? Why? ✦ Which locations, and lighting conditions were most effective? Why? ✦ What do you wish you had done differently? |
WEEK EIGHT Final Portfolio
FINAL PORTFOLIO INTRODUCTION
The purpose of this assignment is for you to practice all the skills you’ve learned in the course. The work you present in this assignment must represent your best work. You may include imagery from previous assignments. However, everyone has work they know needs improvement. This is your opportunity to re-shoot, or
otherwise make the changes you want. You will create a portfolio of your work.
ASSIGNMENT IMAGERY REQUIREMENTS
Your portfolio must consist of no less than 20 images. Five images must be new, captured specifically for use in your final portfolio. Within the entire compilation, you must include at least two photographs representing at least one of each of the following previous assignments:
✦ vantage point
✦ pinhole photography
✦ still life
✦ architecture and interiors
✦ landscape and nature
✦ portraiture
✦ experimenting with the photographic surface
When you produce new imagery for your final portfolio, be mindful of your camera settings. Submit all exposures created in the effort to complete this assignment. Compile into digital contact sheets and upload with the other assignment components. You must also include:
✦ Digital contact sheets
✦ Thorough exposure records
|
WRITTEN REQUIREMENTS
The written portion of the assignment should include a description of your process. Explain your technical and creative decisions. Here are some of the questions to answer... ✦ What camera settings did you choose? Why? ✦ How did you compose the images? Why? ✦ What did you do to alter the images? Why? ✦ Which techniques did you find most successful? Why? ✦ Which techniques did you find least successful? Why |
OVERALL PRESENTATION
✦ Simple contact sheets of the refined, final imagery is far too casual a presentation to be considered a final portfolio. You will, however, need contact sheets and exposure records, as separate documents, for the new imagery you create for the final portfolio. ✦ Try to create your portfolio as professionally as possible. You can create, for example, a PDF booklet or Powerpoint presentation. You can paste the shots into a word processing document. Just consider the finished product as a self-contained, professional work. ✦ The structure of the portfolio is entirely up to you. Just make sure the imagery is the primary focus. Avoid decorative layouts and embellishments. These will only detract from your images. Keep it simple. |
